| All sales are final back to loom knitting index Back to home page |
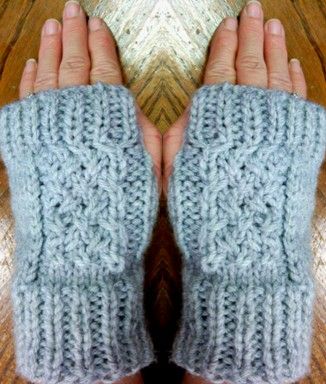 CABLED KISSES-fingerless gloves for small gauge Kiss looms  If you wish to knit this pattern on another loom, have 32 pegs to work with, can work in the round and can get 4 stitches per inch, the project should work. But be aware that I have only tested the pattern on Kiss looms. Pattern is only $2
|
 |
 |
  |
|
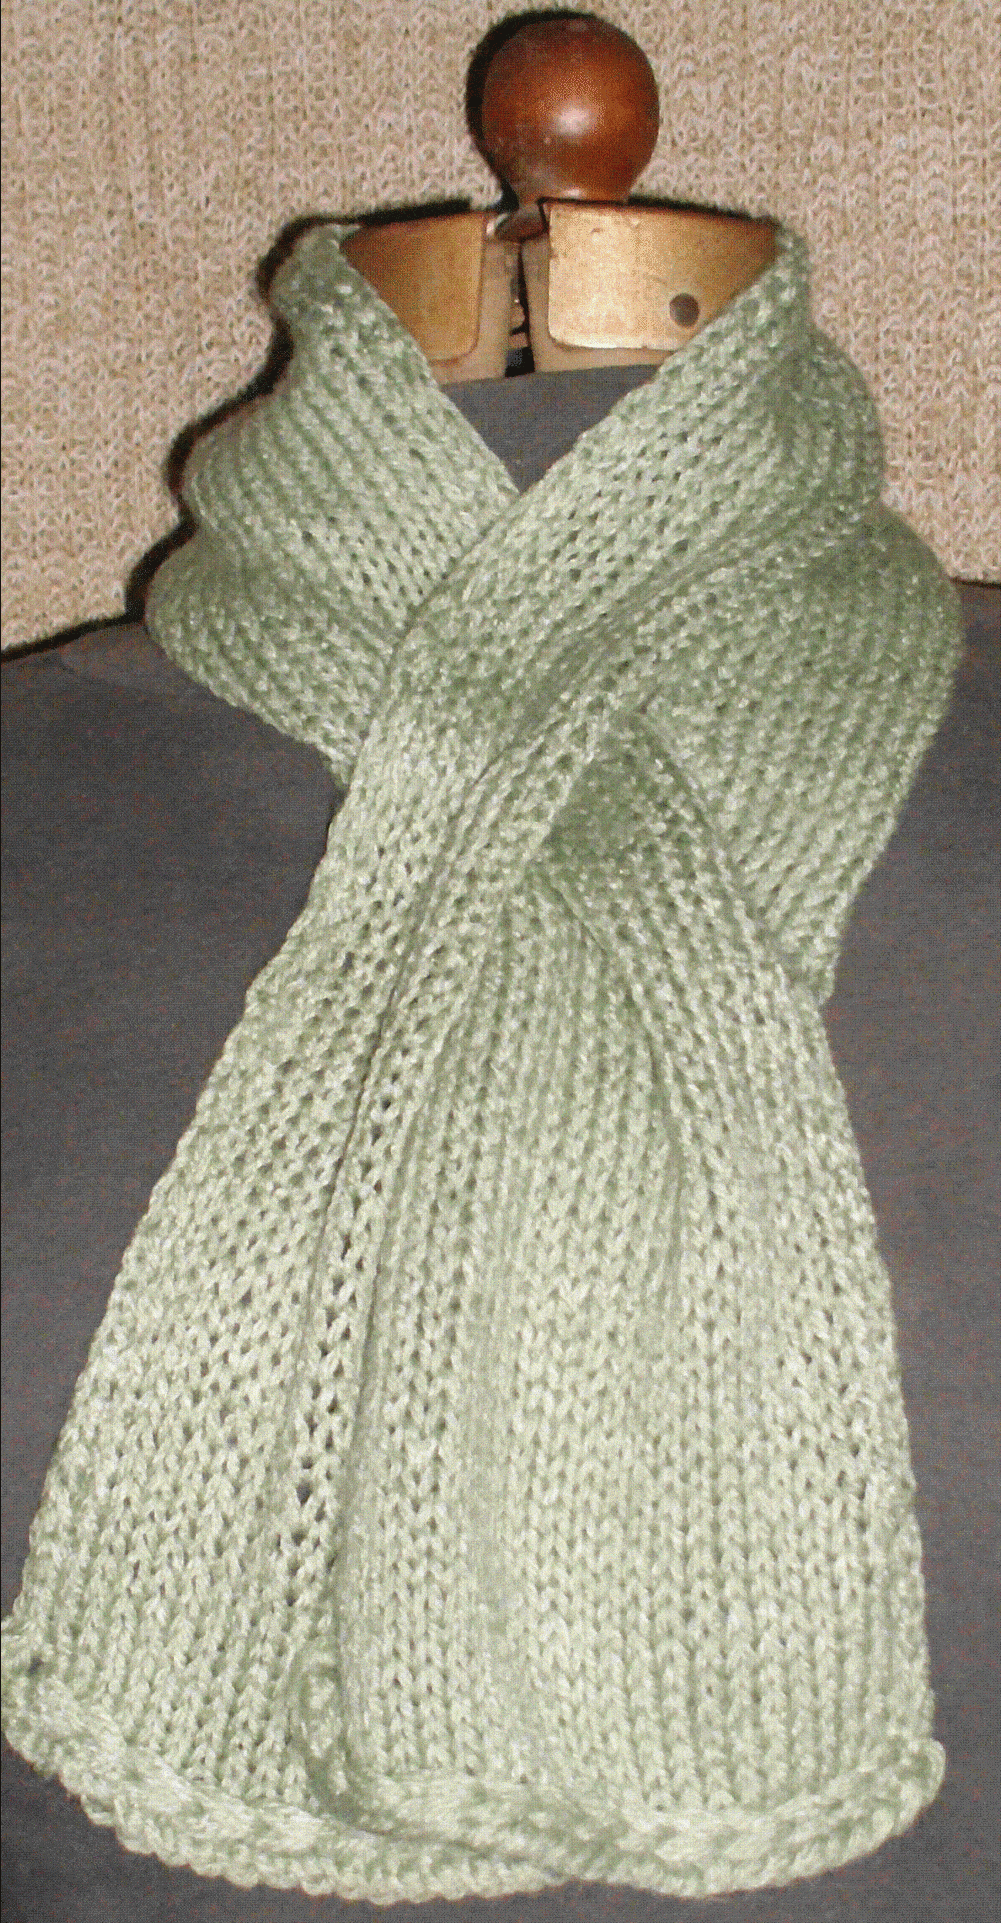
 The Cable-Me-Not Cowl or Scarf shown here in red is a free pattern for the Dragon Loom. Your download will be delivered via Ravelry when you click the Buy It Now button.
download now
The Cable-Me-Not Cowl or Scarf shown here in red is a free pattern for the Dragon Loom. Your download will be delivered via Ravelry when you click the Buy It Now button.
download now
Lattice Lace Dish Cloth may be made on several looms. It is free and will be delivered via Ravelry. 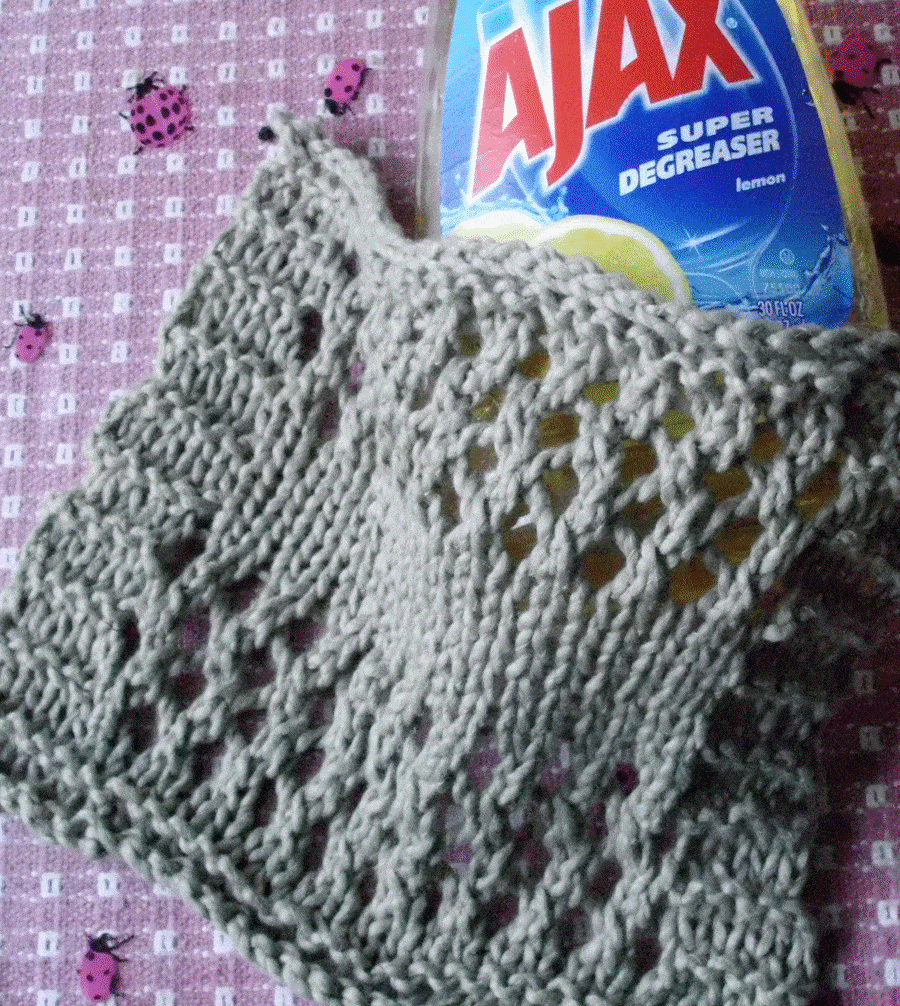 download now |
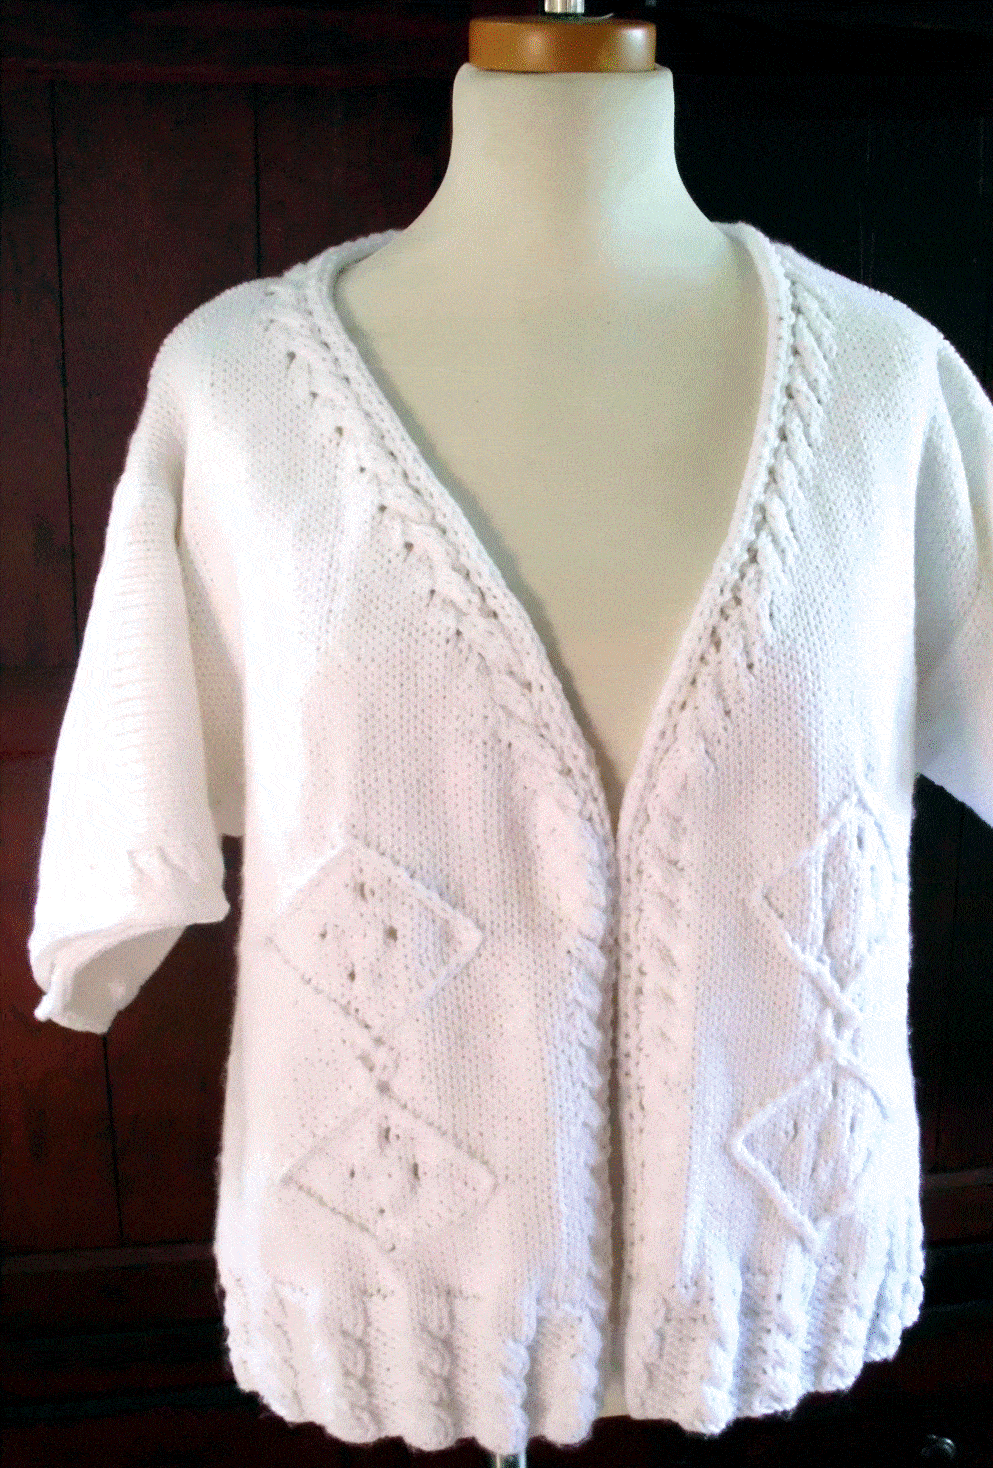
WANDERLUST CABLES & LACE SPRING CARDIGAN YARN: Red Heart With Love or similar worsted weight #4 yarn. The medium size took 18 oz. of yarn. Mathematical estimates indicate that the small would take 15 and the large 22 oz. SIZES: finished bust of 37, 46, 54 The shape has minimal shaping with a kimono styling and looks best if worn quite loosely. The sample is the medium size [46 finished] on a dress form with a 38 bust. All sizes finish to 25long. GAUGE: 3.8 stitches/5 rows per inch in the plain U-stitch sections. If you cannot match the gauge perfectly, you can still get a nice sweater. At 4 stitches per inch the bust sizes will be 36, 41, 52. At 3.5 stitches per inch they will be 41, 50, 59 Choosing a yarn that gets a slightly different gauge can actual help you size the sweater if you pick carefully. STITCHES: U-stitch [single stockinette], purl, 2X2 cable, 1X1 cable, E-wrap LOOM: A Kiss regular or small gauge loom, an All-in-One loom knitting loosely, a Noble Knitter set up as shown at the end of the pattern or any loom that has enough pegs and can match the stitch and gauge may be used. The sample was made on a Kiss small gauge loom with 3 washers for spacing to create the somewhat loose stockinette. 74[90, 106] pegs required to knit the sweater. $4.00 us dollars
MORE Kiss loom patterns Girl Talk American Girl doll outfit Jack's Aran Vest |
KEYHOLE SCARF FOR KISS AND ALL-IN-ONE LOOMS
This scarf stays where you put it because one end slides onto the other so it closes without a knot. Great for the accessory impaired! The pattern is 11 pages, fully illustrated. Don't be intimidated by the many pages. The pattern is very simple to work. The length is due to lots of illustrations, detailed descriptions of techniques and several options so that your scarf can be your personal creation. Single knitted U stitch is recommended for Kiss looms and single knitted e-wrap stitch for AIOs to get a gauge of 4 stitches per inch using worsted weight [#4] yarn. Though created specifically for the Kiss small gauge two way adjustable slim and All-in-One loom, similar looms may also be used. If you are uncertain about your particular loom, e-mail me and we'll decide together if it is a candidate. $2.00 as an instant download.
|
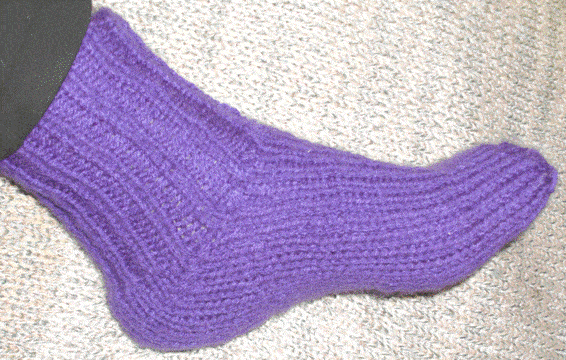
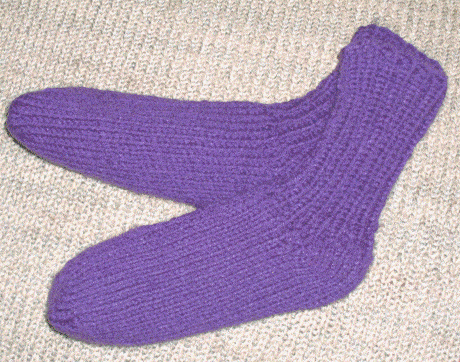
SUPER SOCKS FOR KISS LOOMS
These socks are knitted flat and invisibly seamed. LOOM: Kiss 2 way adjustable small gauge loom set up for double knitting. 29 needles per side are needed for the smallest size. The larger sizes require 33 and 37 needles. Noble Knitters and AIO looms may be set up to do this but all illustrations show Kiss looms. Please double check to make certain that you have enough needles to knit the size you want. STITCHES: k1p1 rib [an unusual method], double board stockinette. Both are described in the pattern. YARN: worsted weight [#4] acrylic or wool GAUGE: 4 stitches/6 rows/inch in double stockinette. Row gauge is not critical, stitch gauge is very important to get the fit. SIZES: These socks fit people from size 4 adult and up. Size 4-7 ladies wear the smallest size. 8-11 ladies and 6-8 men wear the next size. 12 and up ladies and 9-11 men wear the largest size. $2.99 us dollars
All of these patterns work best on the Kiss looms you'll find on this page
|
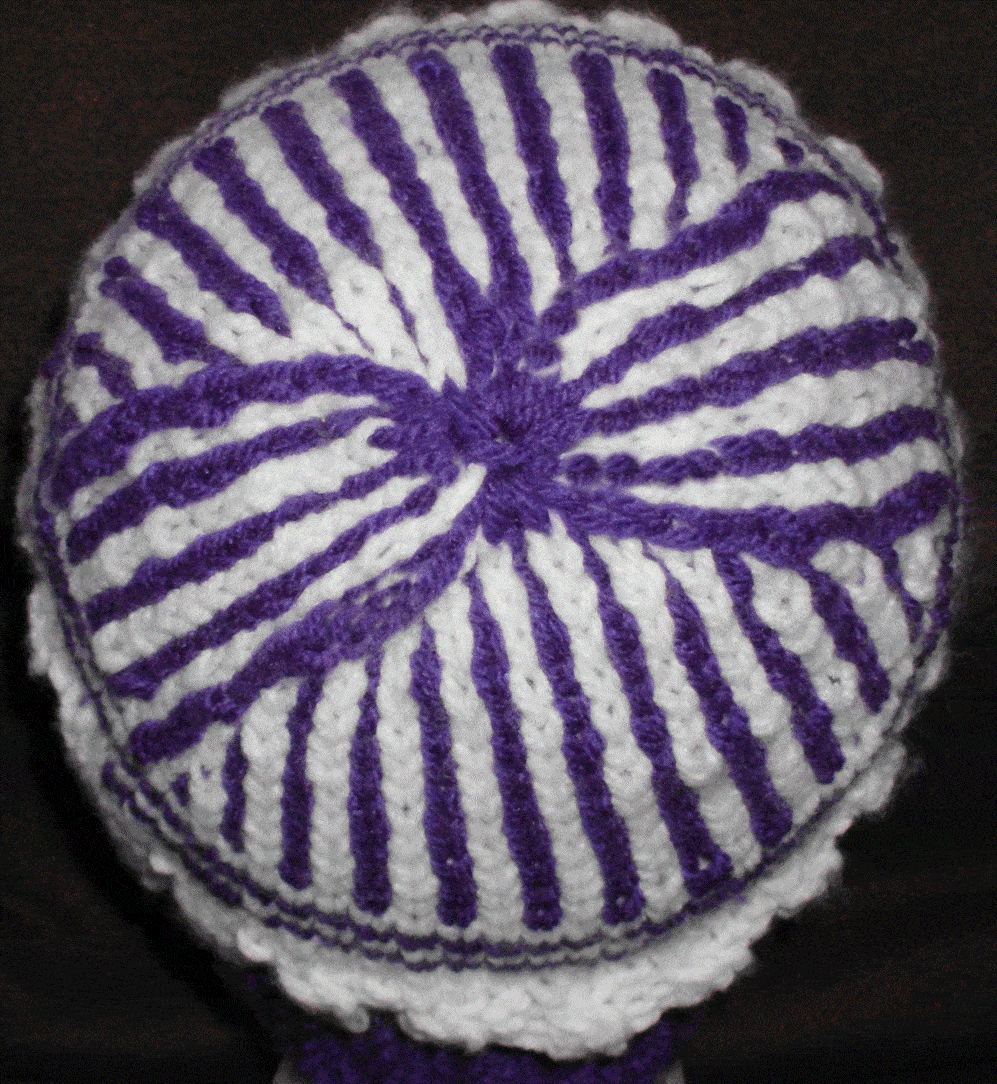
CABLES & STRIPES KISS HAT FINISHED SIZES: 18/45.7cm[15]/38.1cm in circumference. The fabric is very soft and stretchy so these hats will fit heads 2-3/5-8cm larger than the hat measurement. STITCHES: U-wrapped knit, purl, 1x1 cable, fairisle. Cable and fairisle techniques are fully explained. Knitting and purling are basic skills and are not detailed. GAUGE: 4 stitches/5 rows per 1[2.54 cm] measured in stockinette knitting using any worsted weight [#4] yarn. LOOM: Pattern is designed especially for the Kiss 2-way adjustable small gauge loom with 29 pegs per side and 7 peg sliders on the ends. The samples were knitted using 2 washers between the boards to achieve the gauge. Regular gauge Kiss looms may be used if you can match the gauge and have an adequate number and arrangement of pegs. Other brands of looms are not recommended because the decreasing method is only available to Kiss looms. $2.99 us dollars
|
 This bunny cable was inspired by one a friend spotted in a hand knitted project. It is not a copy. Different proportions and techniques work better for the loom and we never saw the instructions anyway. So if you happen to have hand knitted a bunny cable, don't expect this to be identical because I am certain it is not. I did things quite a bit differently than what I think I spotted on the hand knitted sample. But it was a great mental kick start! Directions for Kissing this cable and a video playlist are below. Kissable Cables Playlist |
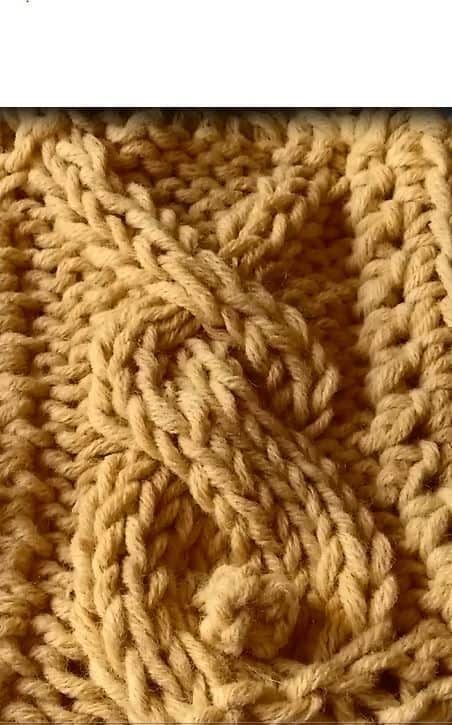
Kiss Bunny Cable (c) 2015 Kathryn Doubrley [aka Kate Winslow on facebook]These instructions are free but please respect copyright by suggesting that those who want them come here to get them. Also, if you run into problems, don't assume that the problem is you! Get in touch and I'll help you work through it. It is always possible that the instructions need polishing and I'll be glad to have your help spotting that and will fix it. The cable is actually worked across 8 stitches. The instructions include a background of purl stitches, 3 on each side of the cable. These will set the cable off and make it very visible. Therefore the instructions include 14 stitches.The cable works best using a small gauge loom adjusted to knit bulky yarn. The reason for this is that the small gauge keeps the pegs close together and the stitches are proportionately large compared to the width of the loom. Technically, the operations are all possible with other gauge arrangements but I will tell you that I tried quite a few and this was the only way I truly enjoyed doing this cable and that it met my standards of attractiveness. It would not have to be a small gauge loom to get this effect. The issue is proportion. So if you adjusted a fine gauge loom to knit worsted weight yarn well or a regular gauge loom to knit super bulky yarn, you'd achieve the same kind of proportion. Begin by knitting 3 rows of purl stitch across 14 stitches. You may certainly use more stitches if you wish to center the design in a pillow, scarf of sweater. Just knit whatever you wish up to the center 14 stitches, then follow the instructions. You will want to set up so that, if you are right handed, the first cable row is worked right to left and, if you are left handed it is worked left to right. That may mean working an extra purl row prior to the cable which is perfectly all right. Row 1: purl 3, knit 8, making a 4 X 4 cable cross on these 8 stitches, purl 3. The 4 X 4 cable on a loom is a challenge. I have developed a special technique that is shown in the Kissable Cables video series. You'll benefit from watching that. Row 2: purl 3, knit 8, purl 3. You have some options on these rows. If knitting a free standing panel, you may wish to slip the first of the purl stitches each row so that would be slip 1, purl 2. You may also knit more rows here, making the bunny's body longer. Row 3: purl 3, knit 3, knit the next 2 for several rows, creating a bobble. Hang the bobble. There is a video devoted to this step. Knit 3, purl 3. Rows 4-6: purl 3, knit 8, purl 3. Row 7: like row 1, a 4 X 4 cable with 3 purls to either side of the cable. Rows 8-10: Like rows 2-6. If you lengthened the body of the bunny, you may or may not wish to lengthen the head a little by adding 1-2 rows. There are no 4 X 4 crosses after this point so it is not such a great concern whether you are now working from the right or left end when a cable is crossed. Row 11: purl 3, knit 4, working a 2 X 2 cable on these 4, knit 4 again, working another 2 x 2 cable. Purl 3. See the video on 2 X 2 cables for specifics on how to do this. Here are some options to consider. I like the bunny best using the direction of crossing presented in the video, which I'll call option 1 below. But you can change the look if you wish by crossing the opposite direction. Doing this will make the next row different, too. Row 12: Purl 5, knit 4 and work a 2 X 2 cable on the 4 knits. It does not matter which way this cable is crossed. In other words, either pair of stitches may be replaced on pegs first. If you used option 2, this row is different: purl 3, knit 2, purl 4, knit 2, purl 3 and there is no cross. Row 13: If you used option 1, purl 5, knit 4, purl 5. The center 4 stitches are going to be the bunny ears. If you crossed differently on row 11, you will purl 3, knit 2, purl 4, knit 2, purl 3. Using this option, your bunny ears are already at the outer sides of his head. Using the first option, demonstrated on the video, the ears begin positioned at the center to the top of his head.If you knit option 2, your bunny ears have less distance to move outward and rows 13-16 will be the same as this one. Row 14: purl 5, knit 2, cross the 2 knit stitches and the purl stitch, keeping the purl stitch in the background by crossing the knit stitches first.Knit 2, purl 1, cross the knits and the purl keeping the purl in the background. Your knit stitches [ears] are moving away from each other and background stitches are filling in the space above the bunny's head. Finish with purl 4. If you knitted option 2, this row is different. It involves no crosses. Purl 3, knit 2, purl 4, knit 2, purl 3. Row 15: for ear option 1, purl 4, knit 2, purl 2, knit 2, purl 4. For option 2, repeat row 13. Row 16: purl 4, knit 2, cross the last purl with the knits. Purl 2, knit 2, purl 1, cross the purl with the last 2 knit stitches, purl 3.For ear option 2, repeat row 13. Row 17: Both ways of knitting the ears will be the same this row: purl 3, knit 2, purl 4, knit 2, purl 3 If you have a larger field of purl background and wish to make exaggerated ears, keep working crosses every other row for a couple more rows. You may also move the ears apart more quickly by crossing knit and purl stitches every row or more slowly by doing so every 3rd row. I suggest that you make one bunny just as written to see how it looks in your yarn & gauge and with reference to the project you have in mind. After that, it will seem much clearer and simpler in your mind and you'll be able to try variations for fun. finish with at least 3 rows of purl to set create a background for the top of the bunny. |
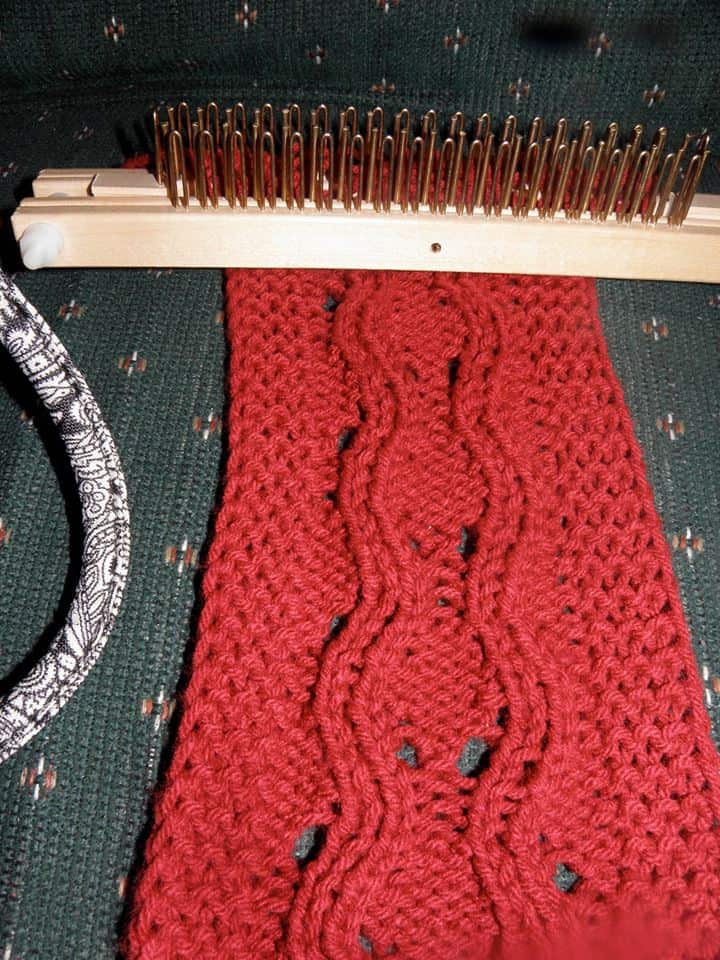
Lace Edged Wavy Lines Cable © 2015 Kathryn Doubrley http://www.theanswerlady.com Knitted on 19 pegs Abbreviations: SL=slip, K=knit, P=purl, W=wrap an empty peg Row 1:L1, K6, P2, K1, P2, K7 Row 2: SL1, P3, K3, P2, K1, P2, K3, P3, K1 Row 3: SL1, K6, P2, K1, P2, K7. Move the stitches on pegs 8 & 9 to pegs 7 & 8, move those on pegs 11 & 12 to 12 & 13 Row 4: SL1, P3, K2, P2, W1, K1, W1, P2, K2, P3, K1 Row 5: SL1, K5, P2, K3, P2, K6. Move the stitches on 7 & 8 to pegs 6 & 7, move 12 & 13 to 13 & 14 Row 6: SL1, P3, K1, P2, W1, K3, W1, P2, K1, P3, K1 Row 7: SL 1, K4, P2, K5, P2, K5. Row 8: SL1, P3, K1, P2, K5, P2, K1, P3, K1 Row 9: SL1, K4, P2, K5, P2, K5. Move these stitches on pegs 6 & 7 to & & 8, those on pegs 13 & 14 t 12 & 13. Row 10: SL1, P3, K1, W1, P2, K3, P2, W1, K1, P3, K1 Row 11: SL!, K5, P2, K3, P2, K6. Move the stitches on pegs 7 & 8 to pegs * & 9, those on 12 & 13 to 11 & 12. Row 12: SL1, P3, K2, W1, P2, K1, P2, W1, K2, P3, K1 Repeat these 12 rows for the length desired. You may alter the cable by repeating rows 1 & 2 and rows 7 & 8 an additional time to elongate the cable. The cable may be shortened and sharpened by omitting rows 1 & 2 and rows 7 & 8. Be sure to watch the video series on this cable. That will make it really clear and easy to knit. You may add extra garter stitch or repeat the cable to widen the pattern. The photo is of the wavy lines cable being knitted by my friend Melanie Fulton from our Kiss knitting group. Great job, Melanie! |